You've probably heard of Patreon. An online membership service which enables content creators to be paid on a recurring basis by the communities that supports them. While Patreon works well for some people, it's notorious for its censorship of free speech. But like any centralized service, it has a single point of failure where administrators have the power to shut you down at any moment if they deem you a liability. The alternatives for Patreon is growing exponentially but there are still not many existing solutions that are truly censorship-resistant. Patreon also takes a significant chunk of content creators revenue.
LibrePatron is a self-hosted Patreon competitor where creators are owners of the entire platform. The software is free and open-source for anyone to use. LibrePatron uses BTCPay Server (opens new window) to receive Bitcoin payments on a recurring basis.
Deploy it, configure it to your needs and receive donations from your supporters. It's that simple. You can accept Bitcoin payments (Lightning Network or on-chain) combined with credit cards payments via Square which makes LibrePatron the only real censorship resistant solution independent of any third-parties.
In this article, I'd like to teach you how to launch your own Patreon-alternative on your BTCPay Server. Whether you're a content creator or an open-source developer looking for a way to fund your work on an open-source project, I hope you'll find it useful.
Before we begin, I would like to mention an earlier post (opens new window) where I had an interview with the creator of LibrePatron. Feel free to check out that interview if you're interested in learning why Jeff decided to launch the project in the first place.
# Requirements
Before we go down the rabbit hole there are just two things you'll need:
- A self-hosted BTCPay Server
- Domain name
This guide assumes that you are familiar with BTCPay Server and that you have a self-hosted BTCPay. Librepatron does not work with any third-party hosts (opens new window).
If you're unfamiliar with BTCPay, it's highly recommended that you take a look at our official website (opens new window) and our documentation (opens new window) to find the most appropriate way to deploy BTCPay (opens new window).
The easiest way to get started with BTCPay is by using 1-click web deployment (opens new window) which requires no technical knowledge whatsoever. Once you deploy your server, wait for it to sync, create an account, a store and configure your wallet as described in the getting started guide. (opens new window)
# Configuring DNS
LibrePatron runs on a domain of your choice on your BTCPay. In my case, that's librepatron.btcpay.ninja.
For a proper deployment of Librepatron you need to point the external IP of our virtual machine and point it to the domain or subdomain.
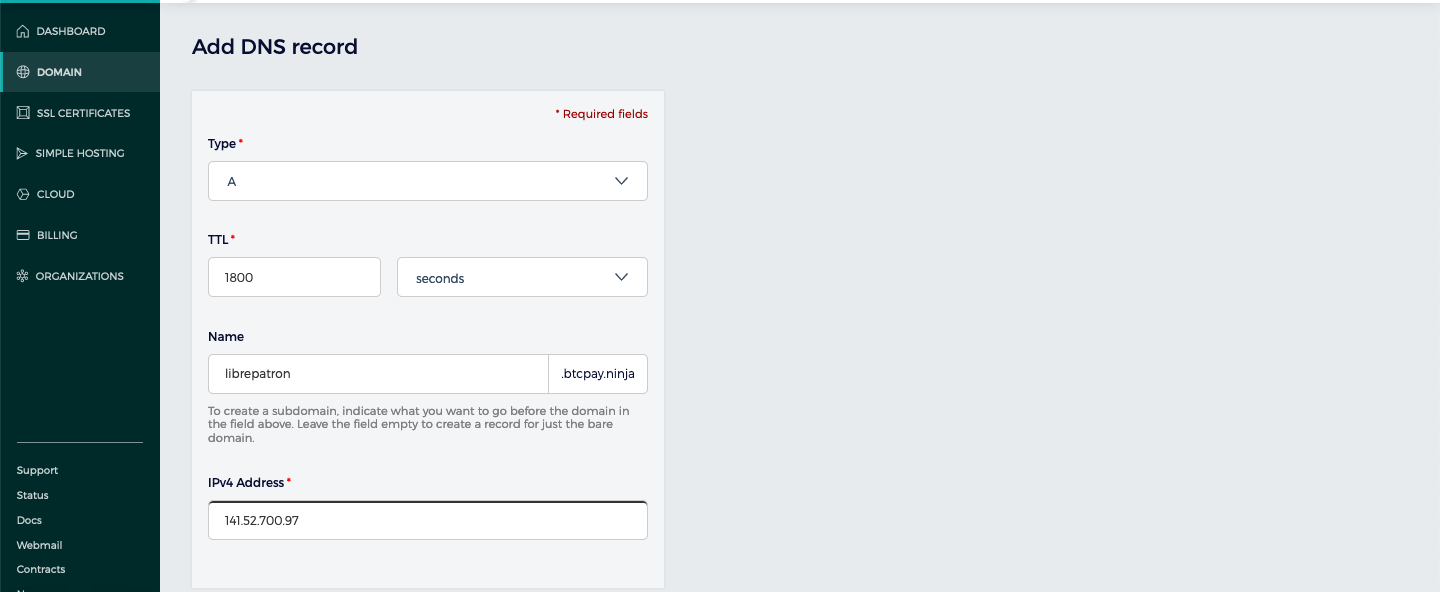
I've set up LibrePatron as the a-record domain.
Adding an A-record domain name and pointing our BTCPay Virtual Machine IP address to the domain where LibrePatreon will appear:
# Deploying LibrePatron on BTCPay Server
Now that we set up our BTCPay Server and configured our DNS, it's time to launch LibrePatron on our BTCPay instance.
Log in into your virtual machine via SSH. If you don't know how to do that you can follow this guide. (opens new window)
Add the following commands. Please make sure to replace example.com with a domain you configured in advance.
<script src="https://gist.github.com/pavlenex/9474997e9da9cc88ef2fbe3b494d8697.js"></script>
# Configuring LibrePatron
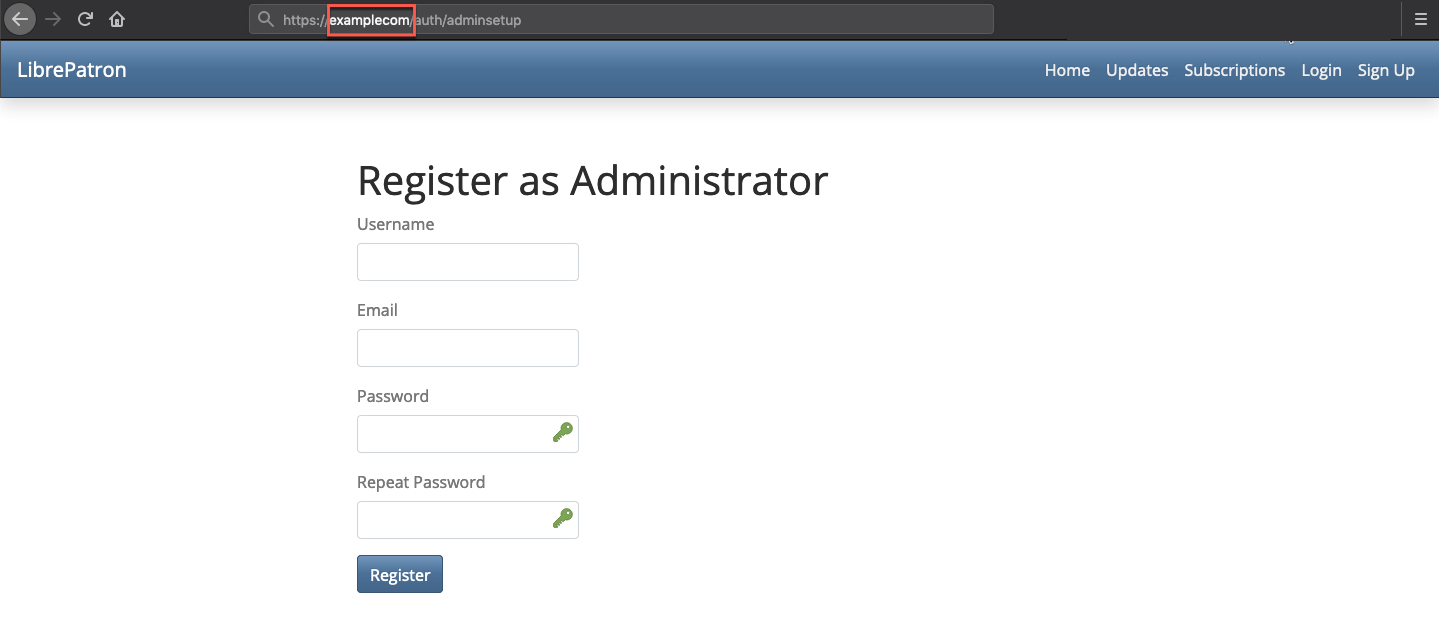
When deploying LibrePatron on your BTCPay, you need to visit the domain name you configured earlier. In my example it's librepatron.mydomain.com. The first time you open a page you'll be prompted to register an administrator account.
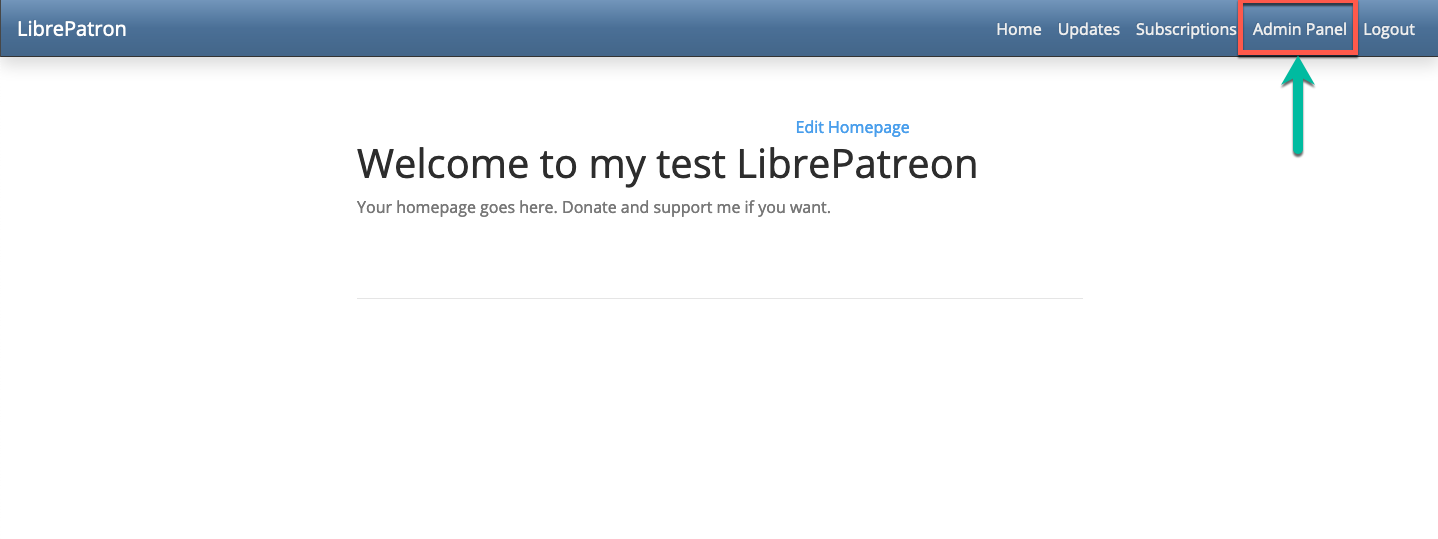
Next, sign in to your LibrePatron and go to Admin Panel.
There are plenty of settings that you can adjust in the admin panel. In this tutorial, we'll go through the essentials only but feel free to explore and adjust LibrePatron to your requirements and needs. The first thing we have to do is connect LibrePatron to our BTCPay Server. Enter the URL of your BTCPay (it will most likely be pre-filled) and click on the link here at the bottom of the page. You'll be redirected to your BTCPay instance access token creation wizard.
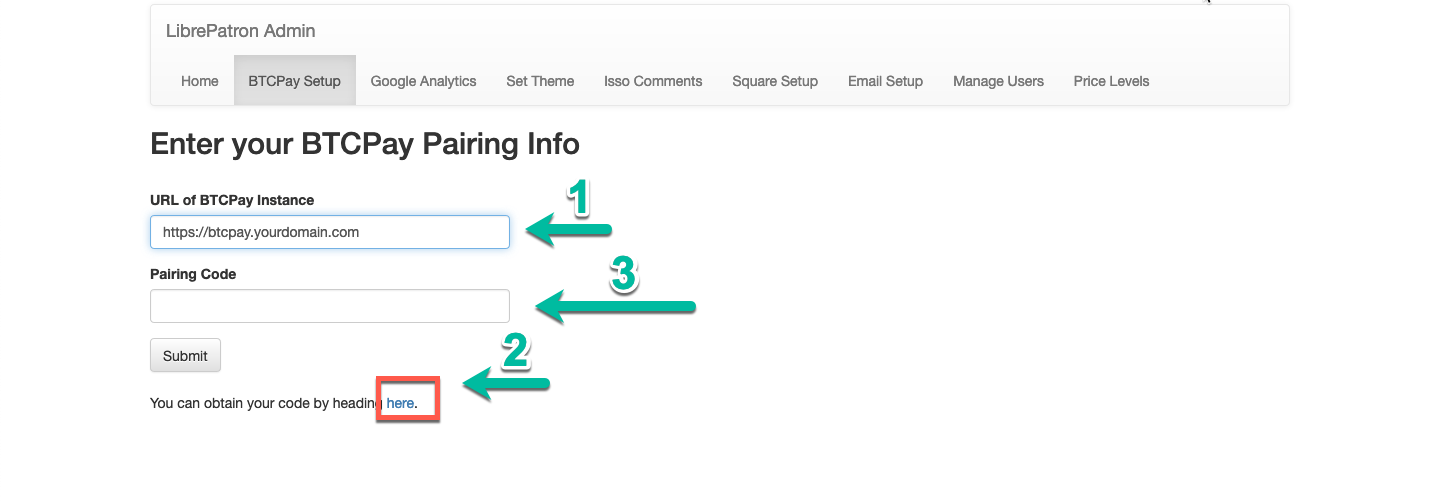
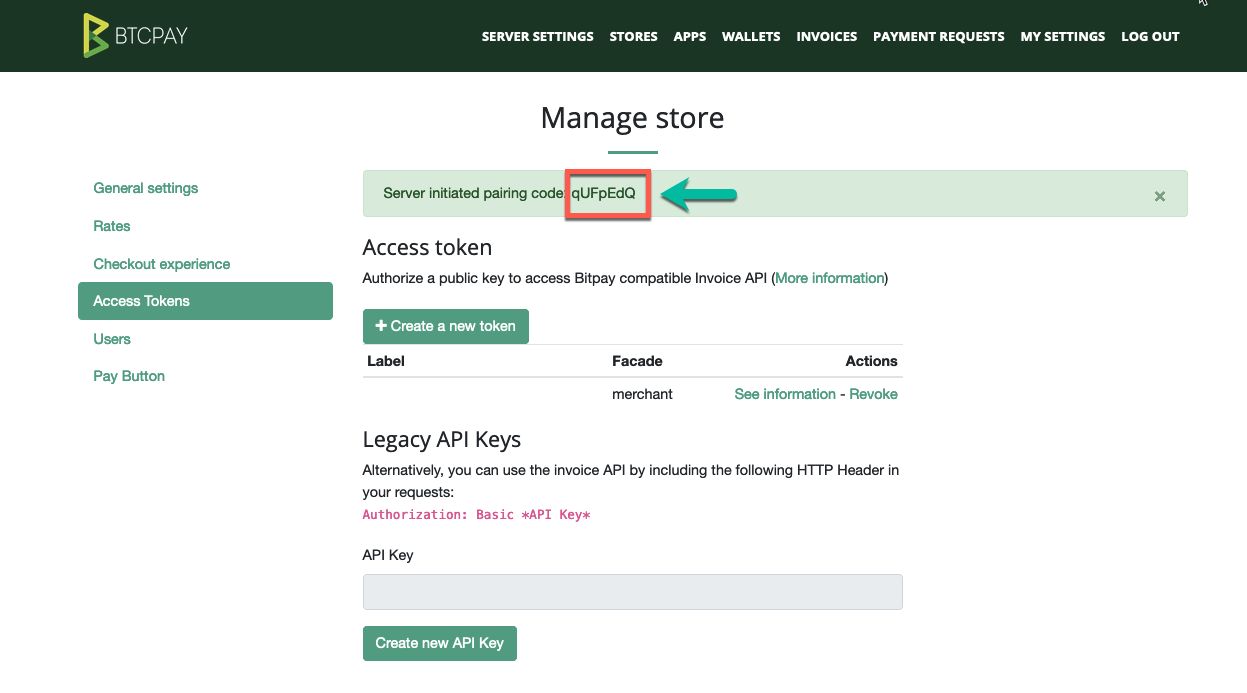
Create the access token and copy the server-initiated pairing code. Paste the code into the Pairing Code field and click submit. If your BTCPay and LibrePatron are successfully paired, you'll see a notification message.
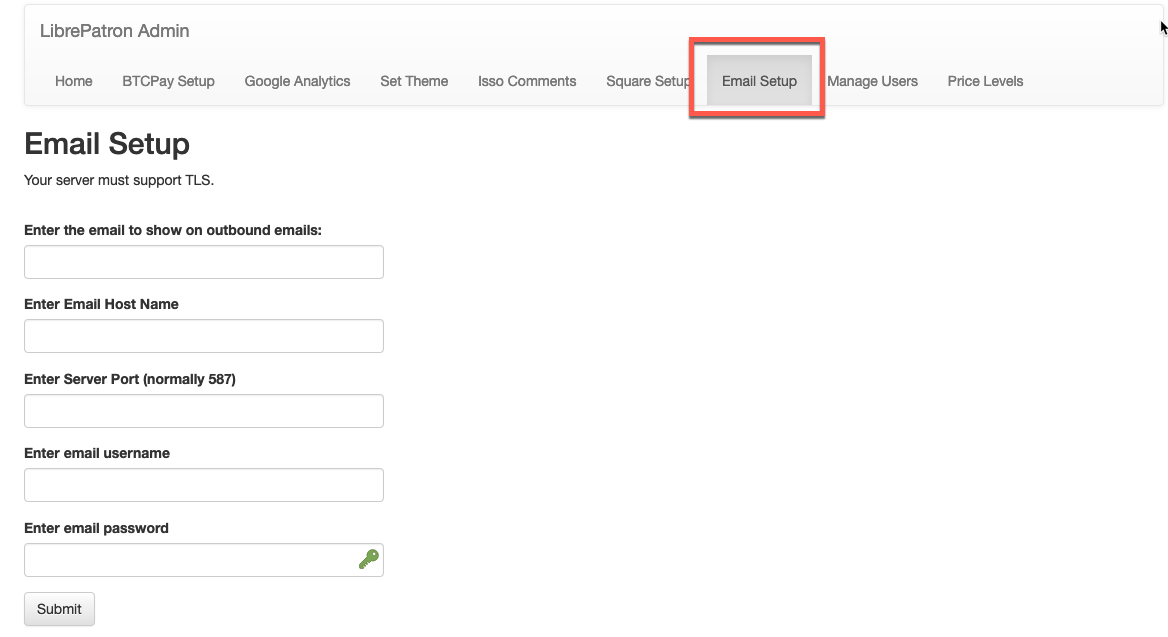
As you probably know, Bitcoin is a push-only protocol meaning that recurring payments are very hard to achieve without access to your wallet. LibrePatron uses e-mails to remind supporters that their subscription should be renewed. This means there's no way to automatically charge your supporters but at least you can remind them to make a payment to support you and access the content you produce.
It's very important that you properly set up your SMTP server so that emails can be sent automatically. Navigate to the Email Setup page and enter your SMTP credentials. The author of LibrePatron recommends easy-smtp (opens new window) as an e-mail provider which gives you up to 10,000 free emails per month. Another alternative is Mailgun (opens new window) which also gives you 10,000 emails free per month.
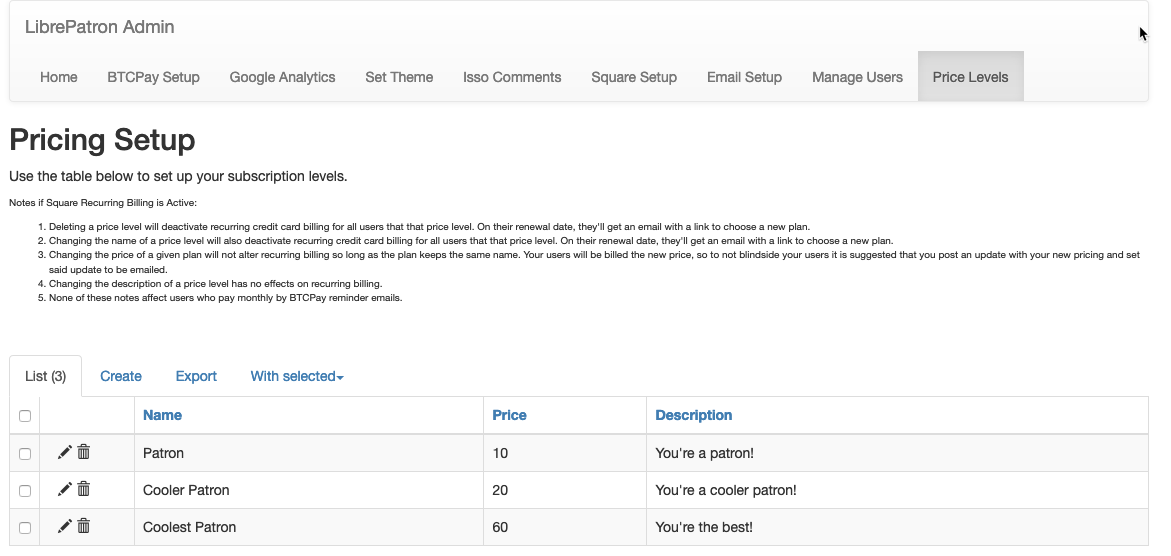
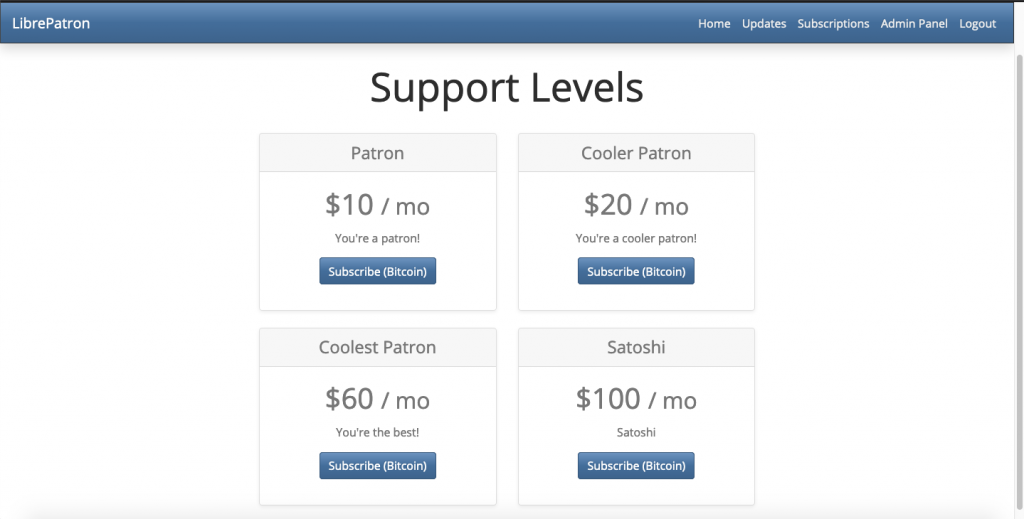
Finally, the price levels page allows you to set up your subscription levels. Configure them to your needs.
And that's it, you now have a self-hosted Patreon alternative that allows you to receive Bitcoin and credit card payments. As mentioned, there are lots of options to play around with so start experimenting on how to make your LibrePatron page appealing to your supporters.
If you have any questions, suggestions or if you're experiencing any problems with LibrePatron you can open an issue on their GitHub (opens new window) or ask questions on their Slack (opens new window) group.
For those of you looking for a Kickstarter and crowdfunding alternative, make sure to check out the Crowdfunding app (opens new window) that's built into BTCPay.