Recently, we published a case study highlighting the success of the Baltic Honey Badger 2023 (opens new window) - a Bitcoin conference where all merchants exclusively used Bitcoin to facilitate payments for food and drinks.
In this post, we're diving behind the scenes of what happened. We'll provide a step-by-step guide on how you can replicate this – by setting up a BTCPay Server and providing individual stores for each merchant.
All technology necessary for this setup is under MIT license, and code is fully available on GitHub:
- BTCPay repositories (opens new window) contain the code for Server itself
- MrKukks Plugins repository (opens new window) contains code for Prism and Sideshift plugins we’ll use
# Video Guide
If you would rather watch a video than read a blog post, you're in luck! You can watch Rockstar Dev execute the instructions from this video and show the setup in action.
# Launch Your BTCPay Server Instance
Before anything else, you’ll need to ensure you have a BTCPay Server instance running. Fortunately, several reputable hosting providers now provide wizards that make this very easy. Our Deploying BTCPay Server documentation (opens new window) lists six noteworthy options:
- LunaNode
- Voltage Cloud
- Clovyr
- Dream Lab Network
- Azure
- Google Cloud
For the purposes of this guide, we'll use LunaNode. It’s the oldest web wizard that supports BTCPay Server deployments (opens new window), all for a reasonable monthly fee of around $15.
Start by registering an account with LunaNode. Create your API keys, then proceed to https://launchbtcpay.lunanode.com (opens new window).
Our Deploying BTCPay - LunaNode Web-Wizard (opens new window) article will guide you through the remaining deployment steps.
# Account Creation and Plugin Installation
With your instance now active and ready, create the main administrative account (opens new window) and log in. Upon this being successful completed, you'll be prompted to create a store (opens new window). Use this store as your primary one - for demonstration and initial testing. This way you can ensure you're familiar with the system before onboarding the merchants.
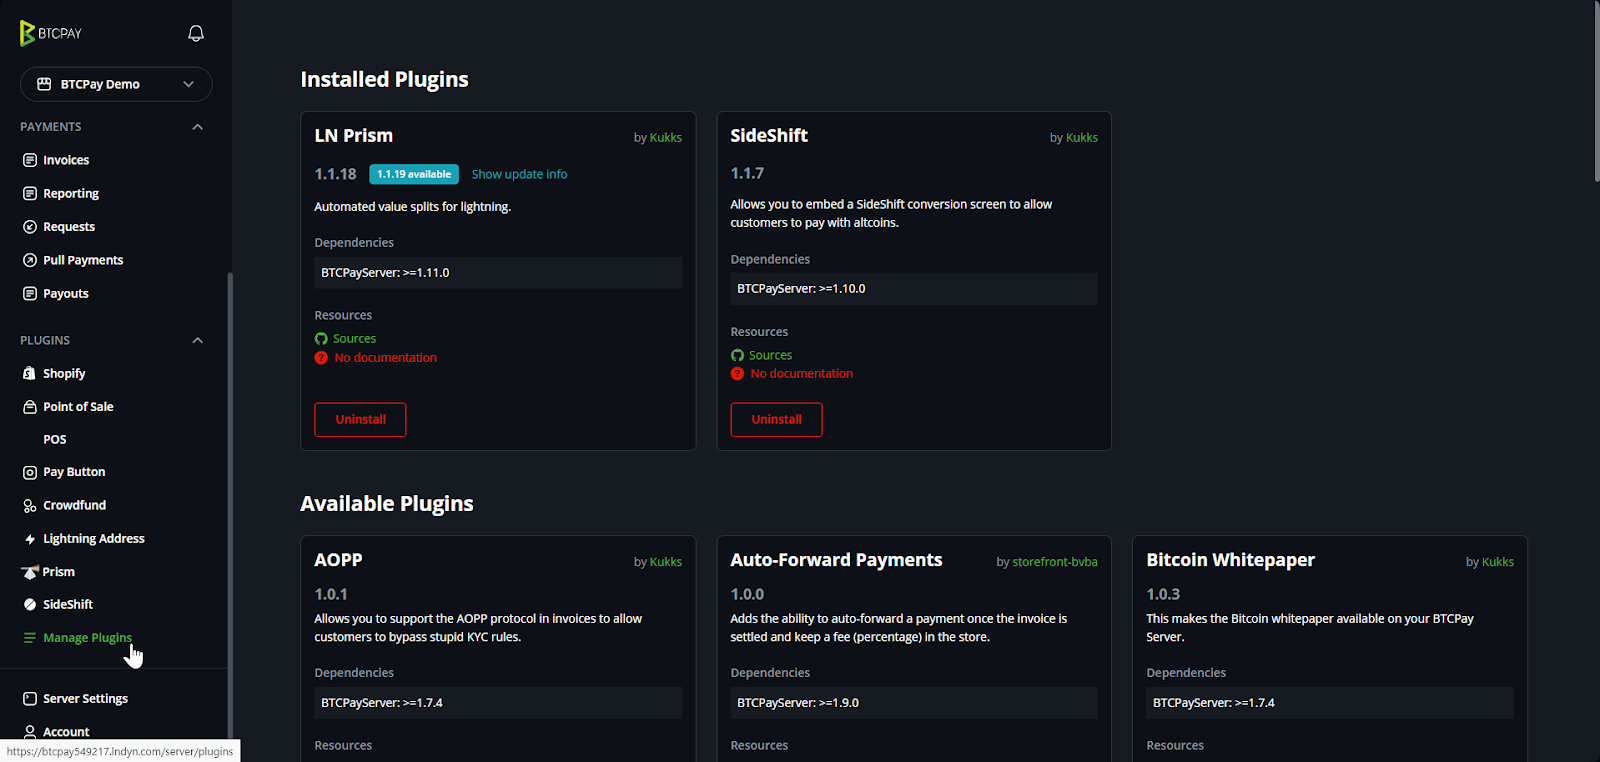
Next, turn your attention to the necessary plugins. Navigate to the 'Manage Plugins' page and install the following:
- LN Prism plugin (version 1.1.18 or higher)
- SideShift plugin (version 1.1.7 or higher)
Once you've added these plugins, you'll be prompted to restart the server. Kindly do so to ensure the changes take effect.
# Setting Up Your Demo Store
To make certain your the upcoming setup operates smoothly, a few configurations are required:
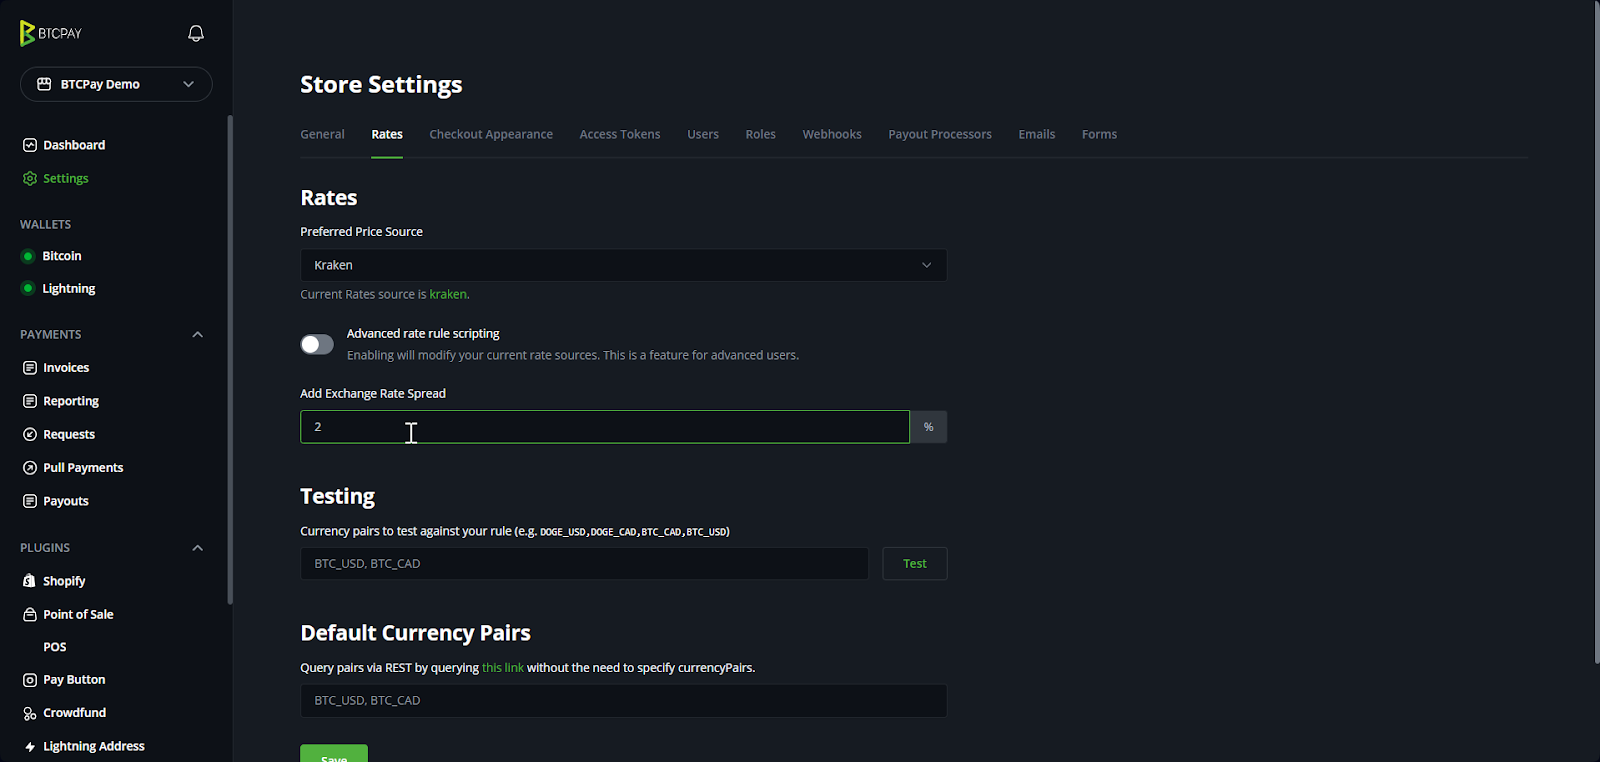
Access the 'Settings -> Rates' and configure the spread to around 2%. This adjustment aims to cover Sideshift transaction fees.
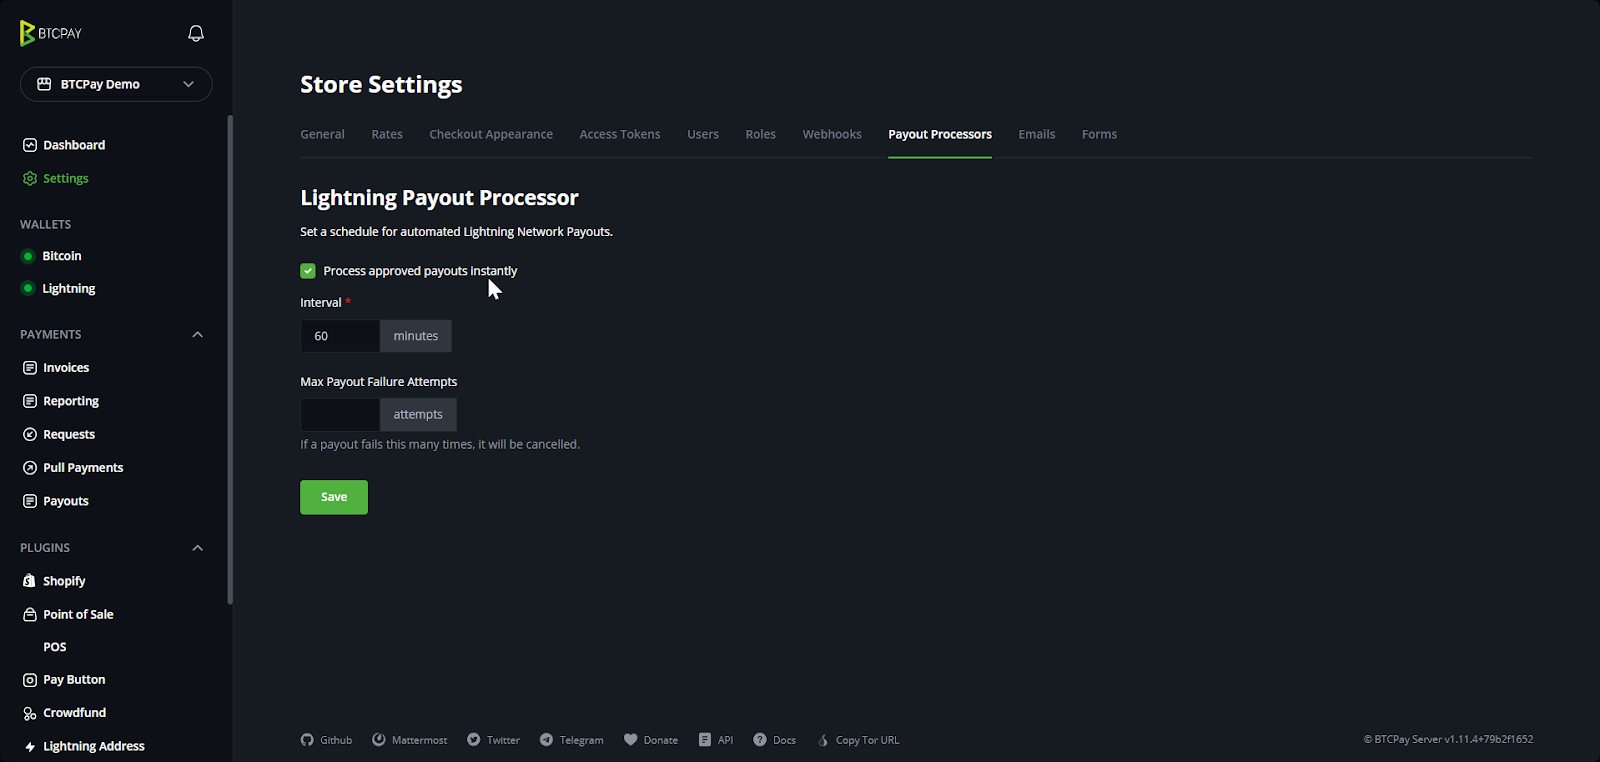
Furthermore, visit 'Settings > Payout Processors'. Here, configure the Payout Processor for Lightning and activate the 'Process approved payouts instantly' option. If you're looking to have faster retries in the event of a hiccup, you can set the interval to less than 60 minutes.
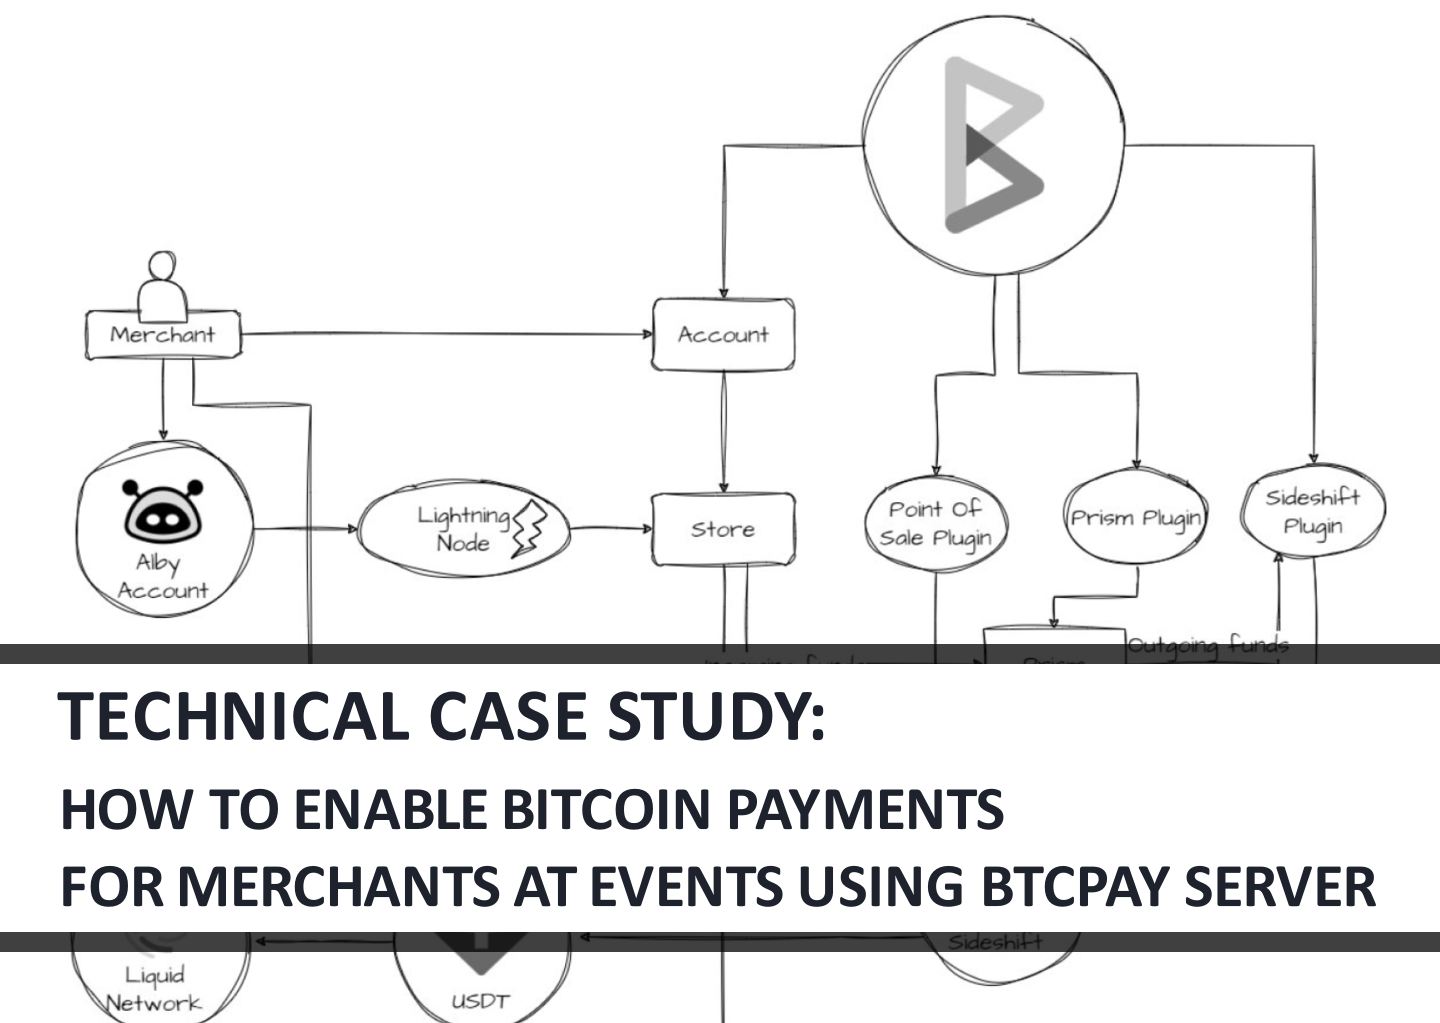
# Harnessing the Power of Lightning Payments
Each BTCPay Server comes with an integrated Lightning node, empowering you to accept Bitcoin via Lightning. But to actually start doing receiving sats - you would need to open channels and manage incoming liquidity.
That's precisely why BTCPay provides support for connecting to remote nodes using different standards. For this guide we will use LNDHub to connect to Alby account. This approach is beneficial for those less tech-savvy - merchants can quickly get setup, sidestepping complexities of the Lightning network.
Here's how you can set it up:
- Have merchants visit https://getalby.com (opens new window) and register an account.
- After logging in, they need to head over to the Wallet page at https://getalby.com/node (opens new window).
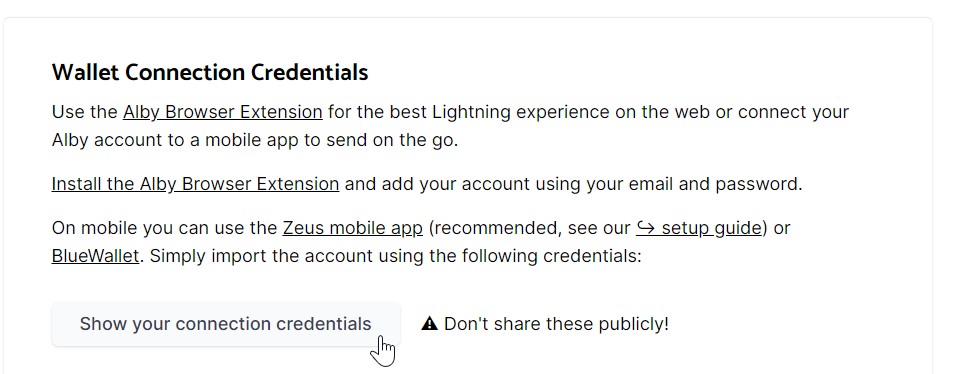
- Scroll to the 'Wallet Connection Credentials' section and select "Show your connection credentials."
- This action will provide you with an LNDHub connection string. Copy this string.
- Paste this string into the Lightning settings section of your BTCPay Server Demo Store.
Voila! Merchants are now set to receive lightning payments, while Alby handles the details of managing liquidity since their node is being utilized.
It is worthy to note that you as the administrator of the BTCPay Server will have access to funds in the merchant's Alby account through the LNDHub connection string.
This is why in the next step we will set up a Prism. The idea being that Bitcoin remains on Alby only until it reaches a certain threshold (we suggest 100,000 sats). Once this amount accrues, it should get forwarded to a destination under the merchant's (could be another lightning address).
# Setting Up a Wallet for Stablecoins & Creating a Prism Destination for Conversion
When it comes to merchants at events, there's often a common concern: hedging against the wild swings of price volatility. Even those that are game for holding onto Bitcoin earnings, want to ensure that when it comes to fixed costs of their vendors, they are covered on every sale.
In this guide we will showcase how Prism can be setup so that:
- 80% of incoming sats will be converted to stablecoin
- 10% will be sent to another lightning address
- 10% will stay on the server for demo purposes
We first need to set up a wallet for stablecoins. We will be using Blockstream Green to accept Liquid USDT. Download it for:
- Green: Bitcoin Wallet for Android (opens new window)
- Green: Bitcoin Wallet for iOS (opens new window)
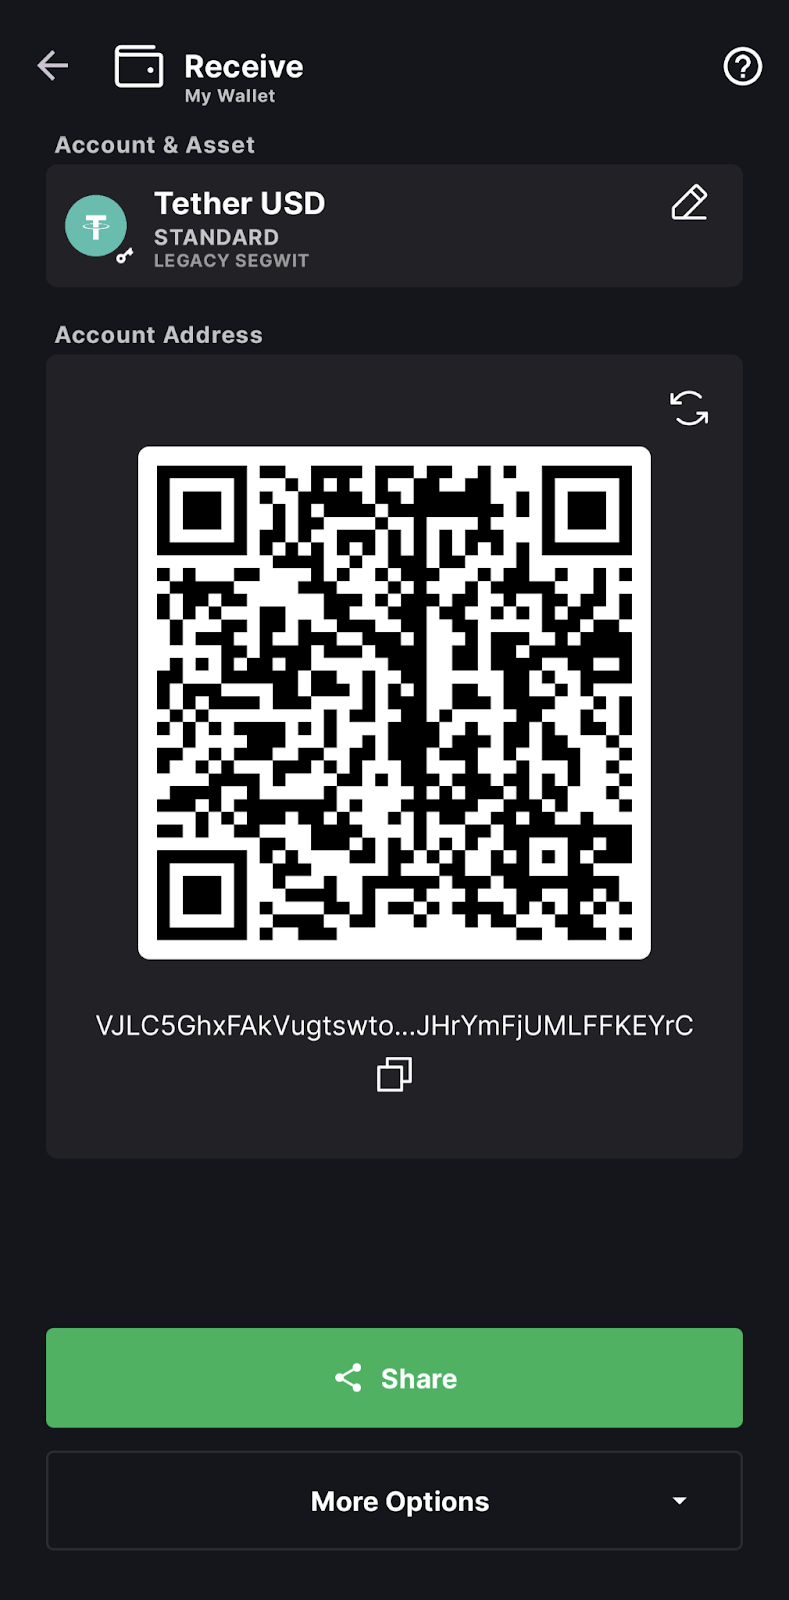
Once you install the wallet, ensure that seed phrase is backed up. Then tap on the Receive button and switch asset to Liquid Tether USD. You will get an address that can now be utilized for accepting stablecoins.
Before we proceed further we need to generate a Sideshift destination which will convert 80% of incoming sats into USDT on Liquid. An important caveat here is that both your location and the BTCPay Server's hosting site need to be outside of the US. SideShift's operations don't extend to US territories, and attempting access will trigger an 'Access denied' notification.
Beyond that, be aware that each conversion incurs around 2% for Sideshift fee + on-chain transaction fee . So for every 1000 sats, you’ll be paying 20 in order for merchants to receive stablecoin in their Green Wallet.
On top of that you need to be aware of Lightning routing fees. Alby right now doesn’t take any percentage for incoming payments, but while forwarding sats from Alby node to Sideshift - you may see ~0.5% fees charged depending on channels used. We’ll talk more about this in the following sections - where we will also be able to configure maximum fees we’re willing to pay.
For now - let’s get back to setup:
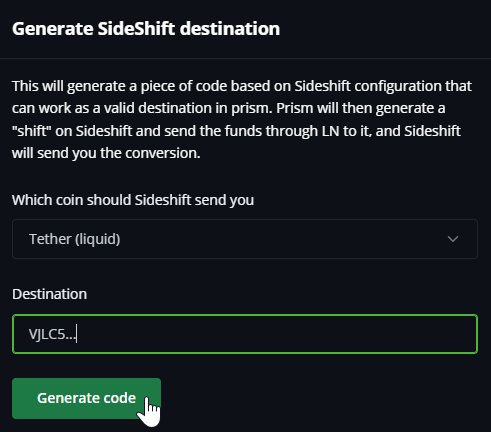
- Navigate to Prism Plugin page and click on Generation Sideshift destination button
- Select Tether (liquid) from the “Which coin should Sideshift send you” dropdown
- Enter Liquid USDT receiving address you got from Green wallet
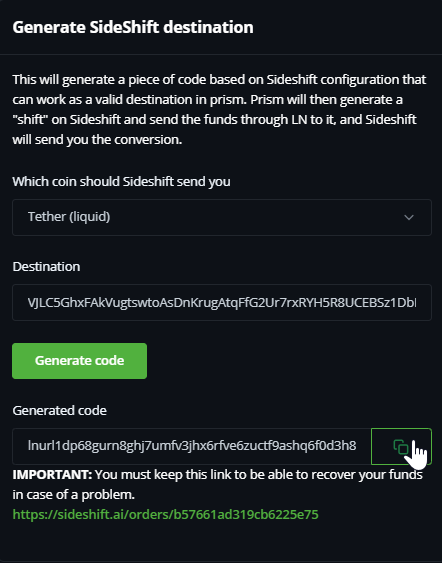
- Click on Generate code
You'll receive an LNURL address, specifically designed for upcoming swaps. Make sure to copy both the LNURL address and the SideShift order URL, and store them in a safe place for later use.
# Setting up Prism
Now it’s time to complete the configuration of Prism:
Click on the Add Prism button.
Set the source to *. This ensures that prism manages all LN payments to the store
Navigate to the Select destination to configure dropdown and select Create new destination
- Destination Id: Input any desired alias for this destination.
- Destination: Enter the LNURL address you obtained from Sideshift.
- Sat Threshold: Check the minimums for conversion at the chosen Sideshift destination. Given the current transaction fee market, consider setting it between 50,000 and 100,000 sats.
- Reserve fee: in percentage. This depends on the channels from your LN wallet. If you boast a robust liquidity route to Sideshift, you can set this as low as 0. This is what we talked about in the previous section about Lightning fees. For this guide, we’ll set it at 1.

We can do the same for lightning address, create another destination using this data:
- Id: OpenSats
- Destination: opensats@vlt.ge
- Sat threshold: 10,000
- Reserve fee: 1
Click Add under the Destination section
- Choose the Sideshift destination and set the percentage to 80%
- Click Add under Destination once more
- This time, select the OpenSats destination and set the percentage to 10%
To activate Prism, tick the Enabled checkbox at the top
Lastly, click Save button at the bottom
Your Prism is now set, and you're primed to accept Lightning payments and redirect them to various destinations.
# Test your payments with Point of Sale app
To experience firsthand the system you've set up, head over to the Point of Sale plugin and create a new POS. For the sake of this demonstration, the only modification we'll undertake is opting for the Keypad view, to have flexibility in testing various payment amounts.
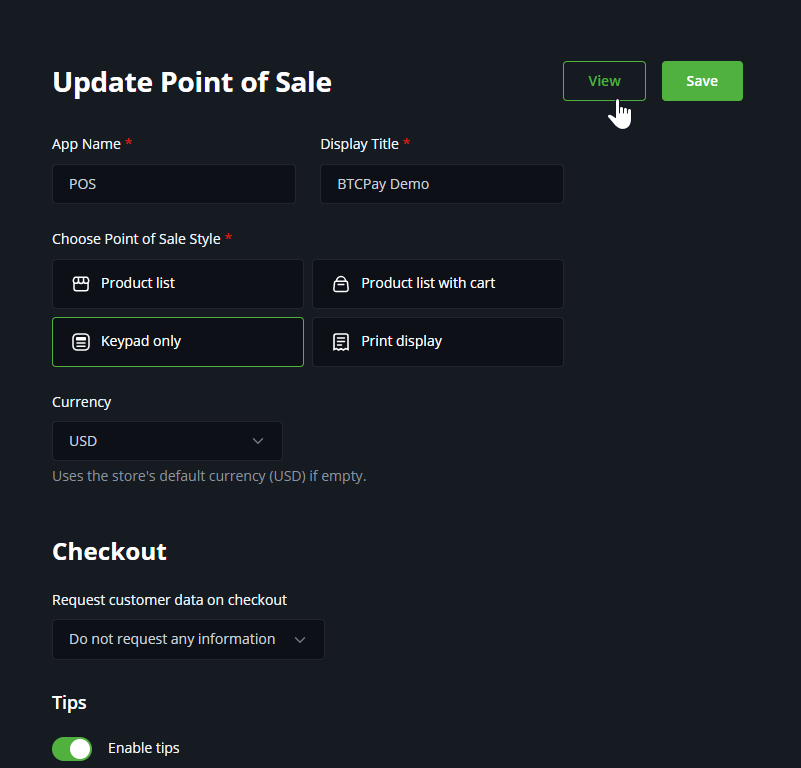
Once inside the View, key in a dollar amount of your choice to test payments. To keep it simple, enter an amount that surpasses the minimum sats threshold you've predefined for forwarding. This way, you avoid the need to execute multiple payments to witness Prism in action.
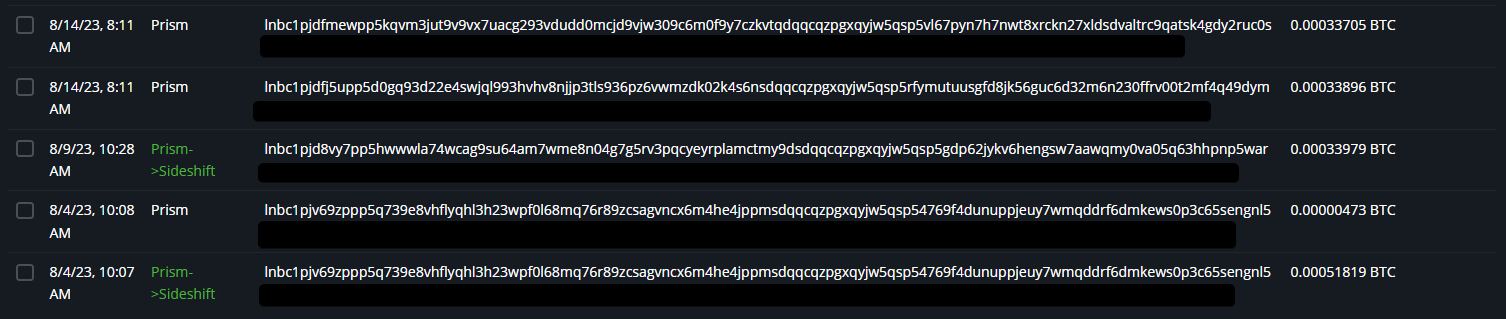
All Prism's forwarding activities can be easily tracked under Off-Chain Payouts, accessible via the Payouts menu on the left. Also, keep an eye out for notifications which pop up next to the bell icon. Here's a sneak peek into how your Prism forwarding list might appear:
# Conclusion
The showcased setup allows you to easily onboard any number of merchants with a single instance of BTCPay Server, and provide them with technology necessary to accept Bitcoin payments and stablecoins. Again - we recommend that you set up Prisms to forward to merchant’s custody with minimal, practical amounts that work in your fee market.
Reflecting on our real-world application of this setup at the Baltic Honey Badger 2023 event in Riga, it's noteworthy to mention that onboarding 20 merchants didn't place any discernible load on the server. Seemingly we could’ve handled orders of magnitude more without any problems.
If you decide to implement this setup for your event, we would love to hear from you! Especially if you venture beyond the 20-merchant mark that we have set. We would love to create and showcase a list of all those that have helped in the battle of taking payment volumes over from legacy fiat rails onto the Bitcoin Lightning network.